Friday, October 31, 2014

Honey Lime Chicken Enchiladas with Avocado Cream Sauce

I cannot say enough good things about these enchiladas.  The filling is sweet and tangy with a slight kick of heat, the sauce is amazingly creamy and smooth, and the joy that will occur in your mouth when these flavors combine is nothing short of food bliss.  My husband and I are in easy agreement that this is easily our favorite enchilada recipe.  It is a little bit of a time commitment, but not overly difficult and trust me, it is WELL worth the time.  Don't let the ugliness of the picture fool you, these enchiladas are life changing.  At least as much as any food can be.

Honey Lime Chicken Enchiladas with Avocado Cream Sauce

Number of Servings: 5-6
Time to Prepare: 1 hour 30 minutes


Enchilada Filling
  • 1 1/2 Tbsp oil
  • 1/4 cup finely chopped onion
  • 1 clove garlic, minced
  • 1 1/2 Tbsp flour
  • 1/8 tsp cumin
  • 1/8 tsp pepper
  • 3/4 cup chicken broth
  • 1 (4.5 oz) can chopped green chilies, rinsed and drained
  • 1/8 tsp oregano
  • 1/4 tsp salt
  • 1/2 jalapeno pepper, seeded and finely diced
  • 2 Tbsp honey
  • 1 Tbsp lime juice
  • 1 clove garlic, minced
  • 1 cup cooked, shredded chicken
  • 1/2 cup frozen corn
  • 1/2 cup canned black beans, rinsed and drained
  • 1 1/4 cups shredded Monterey Jack cheese, divided
  • 8 fajita-size (6") flour tortillas
Avocado Cream Sauce
  • 2 Tbsp butter
  • 2 Tbsp flour
  • 1/2 cup chicken broth
  • 3/4 cup half and half
  • 1/4 tsp garlic salt
  • 1/4 tsp onion powder
  • 1/4 tsp salt
  • 1 avocado, pit and skin removed
  • 2-3 Tbsp packed cilantro
  • 1 Tbsp lime juice
For enchilada sauce, heat the oil in a small saucepan over medium heat.  Add the onion and garlic and cook, stirring once or twice, until the onions are soft but not browned. Stir in the flour, cumin, and pepper and cook for 2-3 minutes, stirring constantly. Gradually add the broth, stirring quickly to smooth out any lumps.

Add chopped green chilies, oregano, salt, and jalapeno, then bring to a boil. Reduce the heat to low and simmer for 25 minutes, stirring occasionally.  The sauce should be thickened but still able to drip off a spoon.  Stir in additional chicken broth or hot water a little at a time to thin out if needed.


Set aside to cool.


In a small bowl, whisk together honey, lime juice, and garlic.  Place shredded chicken in a small Ziploc bag and pour the honey mixture over it.  Seal and marinate in the fridge for 30 minutes.


While chicken marinates, make avocado cream sauce: In a medium skillet over medium heat, melt butter.  Stir in the flour and cook, stirring constantly, for two minutes.  Gradually add the broth and half and half, stirring constantly.  Continue stirring over medium heat until sauce has thickened.  Stir in garlic salt, onion powder, and salt and remove from heat.  Let cool for about 10 minutes, then pour into blender.  Add avocado, cilantro, and lime juice and blend until smooth.  Set aside.


Preheat oven to 350 degrees and coat an 8x8 pan lightly with cooking spray.  Spread about 1/4 cup of the enchilada sauce in the bottom of the pan.

Dump marinated chicken into a small bowl.  Add corn, black beans, 3/4 cup of Monterey Jack cheese, and remainder of enchilada sauce.  Stir to combine.  Place 1/8th of the mixture (about 1/4 to 1/3 of  cup) across the middle of a tortilla, roll up, and place in prepared pan.  Repeat with remaining tortillas and filling.  (I squeezed seven enchiladas across the pan one way, then put the eighth the other direction along the bottom edge of the first seven.)


Pour avocado sauce over the top of the enchiladas and spread to cover.  Sprinkle with remaining 1/2 cup cheese.  Bake for 25 minutes.


Source: adapted from Chef in Training and Mel's Kitchen Cafe
Produce Used: Onion, garlic, jalapeno, lime, corn, avocado, cilantro

Wednesday, October 29, 2014

Avocado Egg Rolls

You know when you buy a bag of like six avocados from Costco and then they all ripen at the exact same time?  Yeah, happens to me every time.  However, knowing this would be the case I specifically planned this week to make a whole bunch of recipes with avocado.  Hey, they're heart healthy and help raise your HDL cholesterol levels (the good cholesterol) so why not.  And that makes up for the fact that we're deep frying our food here, right?  I'm going to go with yes.  These egg rolls are super tasty, but the best part about them?  They are crazy fast.  Tasty and fast--now who is going to complain about that?  Not me.

Avocado Egg Rolls

Number of Servings: 10 egg rolls
Time to Prepare: 15 minutes


Cilantro Dipping Sauce
  • 6 Tbsp loosely packed cilantro
  • 3 Tbsp sour cream
  • 1/2 jalapeno, seeded and chopped
  • 1 Tbsp mayonnaise
  • 1 clove garlic, minced
  • 1 Tbsp lime juice
  • kosher salt
  • black pepper

Egg Rolls
  • 2 avocado, pits and skins removed
  • 1 small Roma tomato, petite diced
  • 3 Tbsp finely diced red onion
  • 1-2 Tbsp chopped cilantro
  • 1 Tbsp lime juice
  • 1/2 tsp kosher salt
  • 1/8 tsp black pepper
  • 10 egg roll wrappers
  • oil for frying
To make the cilantro dipping sauce, combine cilantro, sour cream, jalapeno, mayonnaise, garlic, and lime juice in the bowl of a food processor and blend until smooth.  Season with salt and pepper to taste. Set aside.

Heat 2 to 3 inches of oil in a heavy bottomed pot.  Use a deep-fry or candy thermometer and heat the oil to 350 degrees.

In a medium bowl, mash the avocados with a fork. Stir in tomato, red onion, cilantro, lime juice, salt, and pepper.

Place one egg roll wrapper on a clean surface turned on its point like a diamond.  Place 2 to 3 Tbsp of filling near the bottom.  Fold the bottom corner of the wrapper over the filling and roll over once, then fold in the sides and continue rolling tightly. Using your fingers, rub the top corner with water and press to seal.  Repeat with remaining wrapper.
Working in batches, add egg rolls to the hot oil and fry until evenly golden brown and crispy, about 2-3 minutes per side. Transfer to a paper towel-lined plate.

Serve immediately with cilantro dipping sauce.

Source: adapted from Damn Delicious
Produce Used: Cilantro, jalapeno, garlic, lime, avocado, tomato, red onion

Monday, October 27, 2014

Avocado-Stuffed Puff Pastries

These little appetizer puffs are crunchy, creamy, and just a tiny bit spicy.  They take a little bit of assembling, but they are really easier than they look and a definite crowd pleaser.  Or husband pleaser.  You know, whatever you're going for.  My husband ate five of them without batting an eye.  I made these with the the Thai Coconut Lime Soup from a couple days ago and it was a great dinner--looked great but came together without much of a fuss at all.  I got the pastries all put together, then let them cook while the soup did its thing and bam, easy and delicious dinner on the table.

Avocado-Stuffed Puff Pastries

Number of Servings: 15 appetizer puffs
Time to Prepare: 30 minutes

  • 1 sheet puff pastry (1/2 lb.), thawed according to package directions
  • 1 large avocado
  • garlic salt
  • 2 oz cream cheese
  • 1-2 Tbsp Thai sweet chili sauce
  • 1 egg, beaten
Preheat oven to 400 degrees.  Spray a baking sheet liberally with cooking spray and set aside.

Sprinkle your work surface with flour and roll out the pastry dough to a rectangle about 10" by 12".  Use a pizza cutter or sharp knife, cut the pastry sheet into 30 squares, about 2"x2".

Mash avocado and season with garlic salt to taste.  Divide mashed avocado evenly among half the pastry squares (15).  Divide cream cheese evenly among the same 15 pastry squares and place it on top of the avocado.  Top cream cheese with about 1/4 tsp of the sweet chili sauce.  Use the remaining 15 squares to place on top of the squares with the filling and seal the edges to create a little pastry package. 

Place the pastries on the prepared baking sheet, leaving about 1/2" between each puff.  Brush with beaten egg and bake for about 15 minutes, until golden and puffed.

Source: adapted from Averie Cooks
Produce Used: Avocado

Saturday, October 25, 2014

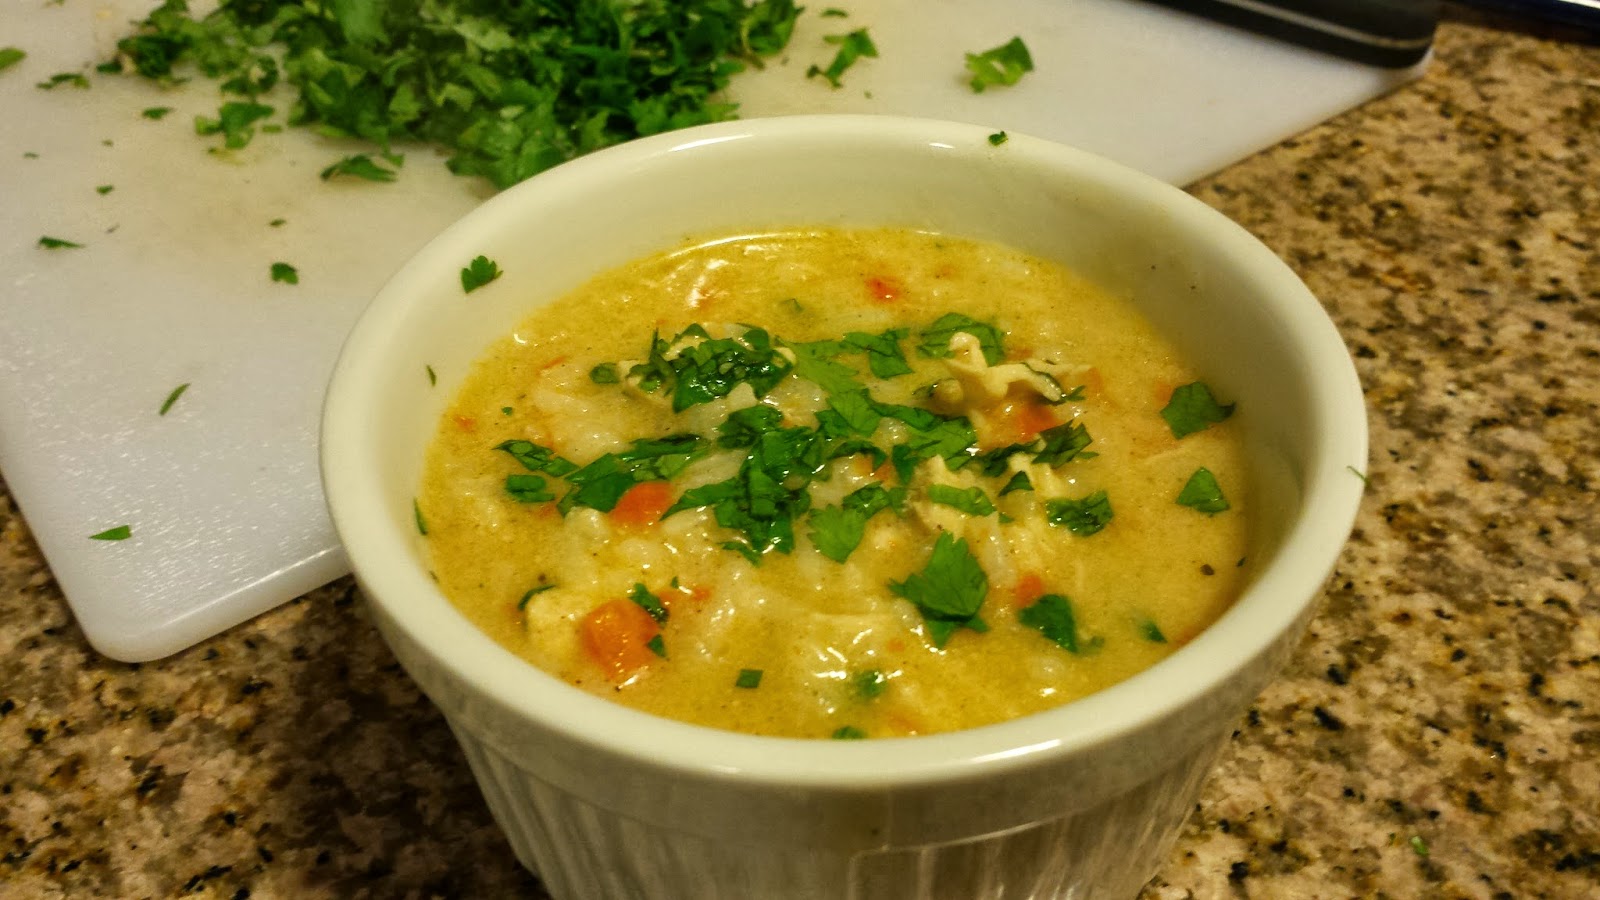
Thai Coconut Lime Soup

I've tried several Thai-style recipes in the last few months and I'm still pretty on the fence as to whether I have a general like for  Thai-inspired food, but this soup I am definitely not on the fence about.  It is hearty and bright, with a great medley of complex flavors.  Oh, and did I mention it is just about the fastest, easiest dinner I've made in the last year?  Use meat from a rotisserie chicken and it can't really get any easier.

Thai Coconut Lime Soup

Number of Servings: 5-6
Time to Prepare: 15 minutes

  • 3 Tbsp butter
  • 1/2 tsp yellow curry paste
  • 1/4 tsp cinnamon
  • 1/4 tsp ginger
  • 1/4 tsp paprika
  • 1/4 tsp salt
  • 1/8 tsp chili powder
  • 1 large carrot, grated
  • 2 cups chicken broth
  • 1 (15 oz) can coconut milk
  • 1-2 chicken breasts, cooked and shredded
  • 1 1/2 cups cooked rice
  • 2 Tbsp lime juice
  • 1 Tbsp fish sauce
  • chopped cilantro
In a large saucepan, melt the butter over medium heat, then stir in the curry paste, cinnamon, ginger, paprika, salt, and chili powder.  Let cook for about 30 seconds, stirring frequently. Add the carrots, stir to combine and let cook, stirring occasionally, for about 5 minutes, until the carrots are soft. 
Add the chicken broth, coconut milk, chicken, rice, lime juice, and fish sauce.  Bring to a low boil, then let simmer for about 5 minutes.  Sprinkle with chopped cilantro and serve.

Source: adapted from Everyday Reading
Produce Used: Carrots, lime, cilantro

Thursday, October 23, 2014

Meatless Navajo Tacos

Does anybody else remember Navajo tacos from the elementary school cafeteria?  I'm not entirely sure I ever even ate them at school (my mom usually made our lunch...we could only buy "hot lunch" on the rare occasion when she was sick) but they always looked so good to me!  So whether I ate them then or not, there is this incredible feeling of nostalgia that these bring on for me.  My version is usually meatless, but don't worry, you won't miss the meat.  Of course, if you look closely at the picture you may notice I cheated this time around--I had some ground sausage in the fridge I wanted to use so I tossed that in with my bean/tomato mixture.  If you're really craving some good animal protein, you can of course cook up some ground beef to add in.  Also....the fry bread (or scone, if you're from Utah) recipe will make 12, but you probably won't have quite enough toppings for that many.  Bummer....I guess you'll just have to eat some fry bread slathered in honey butter for dessert. 

Meatless Navajo Tacos

Number of Servings: 8-10
Time to Prepare: 2 hours


Fry Bread
  • 2 1/4 tsp active dry yeast (1 pkg)
  • 1/2 Tbsp sugar
  • 1/2 cup warm water
  • 1 cup buttermilk
  • 1/4 cup sugar
  • 1 1/2 Tbsp butter, melted
  • 1 1/2 Tbsp vegetable oil
  • 1 tsp kosher salt
  • 1/2 tsp baking powder (slightly heaping)
  • 4 to 4 1/2 cups flour
  • 2 eggs
  • oil for frying (make sure to choose one with high smoke point like canola, peanut, or grapeseed)
Topping
  • 2 (15.5 oz) cans kidney beans, rinsed and drained
  • 2 (14.5 oz) cans diced tomatoes (not drained)
  • seasoned salt
  • shredded Cheddar Jack cheese
  • sour cream
  • shredded lettuce
  • diced tomato
  • diced avocado
  • sliced olives
 Dissolve the yeast and 1/2 Tbsp sugar in warm water. Let stand for 5-10 minutes, until very bubbly and frothy.

In the bowl of a stand mixer, mix the buttermilk, 1/4 cup sugar, melted butter, vegetable oil and salt until completely dissolved.  Add baking powder and 1 1/2 cups of flour and beat on low for 30 seconds, scraping the sides of the bowl constantly. Add yeast mixture and beat on high for 3 minutes.
Add the eggs and mix until completely combined, then stir in remaining flour 1/2 cup at a time until you have a soft dough.  It will be coming away from the sides of the bowl, but it will still stick to your finger when you touch it.  Place the bowl in a warm place and cover with a clean towel and let rise until doubled, about 1 hour.

When the dough has risen, sprinkle a large, clean work surface with flour. Punch down the dough and then roll it into a rectangle about 1/4″ thick. Using a sharp knife or a pizza wheel, cut the dough into 12 rectangles. Separate the dough pieces slightly and cover with a clean cloth.  Let rest while you heat the oil and prep the toppings.

In a large, heavy pan heat about 2-3 inches of frying oil over medium heat until it reaches 350-360 degrees (use a deep-fry or candy thermometer).

While the oil heats, combine kidney beans and canned tomatoes in a large skillet over medium-high heat.  Add seasoned salt to taste.  Let it cook until most of the liquid from the canned tomatoes has cooked off. 

While the beans and tomatoes cook, add a couple dough pieces to the hot oil and cook until golden brown on one side, then flip and cook the other side. Repeat with remaining dough pieces.

Place one piece of fry bread on a plate and top with a scoop of the bean-tomato mixture.  Sprinkle with shredded cheese and top with a dollop of sour cream.  Top with shredded lettuce, diced tomato, diced avocado, sliced olives, or whatever else you like on your tacos.

Source: fry bread recipe slightly adapted from Our Best Bites
Produce Used: Lettuce, tomato, avocado

Tuesday, October 21, 2014

Cheesy Artichoke Bread

Oh man, this bread is tasty.  The gooey, cheesy, artichoke topping is so full of flavor and that little bit of browning you get from the broiler is absolutely lovely.  For just our little family, I actually loaded up the top and bottom of the bread with the artichoke mix, then broiled one and wrapped the other one in foil, put it in the fridge, and saved it to go with dinner the next day.  Even if you have a bigger family, you could obviously double the recipe and do the same thing.  Also, you can use store bought French bread or other crusty bread, but I made my own--about 1/3 of the dough from this recipe was perfect.

Cheesy Artichoke Bread

Number of Servings: 4-6
Time to Prepare: 10 minutes

  • 2 Tbsp butter
  • 2 cloves garlic, minced
  • approx. 7 oz marinated artichoke hearts, drained and chopped (half of a 14 oz jar)
  • 1/2 cup shredded Mozzarella cheese
  • 1/4 cup shredded Cheddar cheese
  • 1/2 cup grated Parmesan cheese
  • 1/4 cup sour cream
  • 1/2 loaf French bread or similar
  • kosher salt
  • black pepper
Melt the butter in a medium skillet over medium-high heat.  Add the garlic and cook until fragrant, about 30 seconds.  Add the artichoke hearts, cheeses, and sour cream to the skillet and stir.  When completely combined, remove from heat.

Slice the bread lengthwise.  Spread the artichoke mixture evenly over both halves.  Sprinkle with kosher salt and black pepper.  Place on a baking sheet and broil for about 5 minutes, until cheese is  melted and beginning to brown on top (watch carefully so it doesn't burn).

Source: slightly adapted from The Girl Who Ate Everything
Produce Used: Garlic, artichoke

Sunday, October 19, 2014

Asian Slaw with Ginger Peanut Dressing

Is it just me or is the freezer never big enough to fit everything you want to put in it?  I feel like there are tons of things out there that people always recommend freezing (homemade chicken/vegetable broth, herb cubes, pesto, homemade burritos or taquitos, etc.) but it seems like my freezer is always jam packed full of food.  And I don't even have any ice cream in there right now!  The point of all this being that I have a handful of recipes requiring edamame that I've been wanting to try, but the edamame we usually buy comes in a giant freezer bag at Costco.  So I've been slowly working my way through some freezer stuff to try to make room for the edamame and I finally did it!  So this recipe might seem similar to the last recipe I posted.  It is.  But it's also different enough that it is totally worth having both of these in your recipe box.  (Do people still have actual recipe boxes?)  This is more of a side dish, as opposed to the entree salad from the last post and the sauce/dressing has a hint more spiciness and nice ginger undertone to it.  Just like the last one, the colors are really beautiful--better than the picture really shows.  I had some green cabbage I needed to use this time, so I put that in instead of coleslaw mix.  That means I am missing the pretty purple pop of the red cabbage, but it still tasted amazing.

Asian Slaw with Ginger Peanut Dressing

Number of Servings: 3-4
Time to Prepare: 20 minutes

Dressing
  • 2 Tbsp honey
  • 2 Tbsp vegetable oil
  • 2 Tbsp rice vinegar
  • 1/2 Tbsp soy sauce
  • 1/2 tsp sesame oil
  • 1/2 Tbsp peanut butter
  • 1/4 tsp salt
  • 1/4 tsp sriracha
  • 1/2 Tbsp minced fresh ginger
  • 1 clove garlic, minced
Slaw
  • 2 cups coleslaw mix
  • 1 cup shredded carrots
  • 1/2 red bell pepper, diced small
  • 1/2 cup edamame
  • 2 green onions, thinly sliced (green and white parts)
  • 1/4 cup chopped peanuts
  • 1/4 cup chopped cilantro
Combine all the dressing ingredients in a small bowl and whisk until combined.  Set aside.

Combine the slaw ingredients in a medium bowl.  Add the dressing and toss well.  Let sit for 10 minutes for the flavors to soak in.

Source: slightly adapted from Once upon a Chef
Produce Used: Ginger, garlic, cabbage, red cabbage, carrots, red bell pepper, edamame, green onion, cilantro

Friday, October 17, 2014

Chopped Thai Crunch Salad

I love a good entree salad.  I have a complicated relationship with side salads--I hate a boring salad with not much to it, but I also hate spending a lot of time putting together a complex salad when I've already spent a lot of time and effort on the main part of the meal.  That's where the entree salad comes in.  When the salad is the main event, it is a lot easier for me to expend the effort to make a fully-loaded salad.  Plus, they are so light and fresh tasting with all the veggies, yet still very filling.  This is a recent addition to my entree salad repertoire, but it is quickly becoming one of my favorites.  It has two different sauces--a vinaigrette to toss with the lettuce and a peanut sauce to drizzle over the top--and trust me, you want both of them.  This salad has great flavor, nice textures, and beautiful color.  What more do you need?

Chopped Thai Crunch Salad

Number of Servings: 2-3
Time to Prepare: 40 minutes (or longer, depending on marinade time)


Chicken
  • 1 Tbsp oil
  • 1 Tbsp soy sauce
  • 2 Tbsp rice vinegar
  • 1/2 Tbsp lime juice
  • 1/4 tsp salt
  • 1/8 tsp pepper
  • 3/4 pound chicken breast
Vinaigrette
  • 2 Tbsp rice vinegar
  • 2 Tbsp Thai sweet chili sauce
  • 1 tsp sesame oil
  • pinch of salt
  • pinch of pepper
 Peanut Sauce
  • 1/4 cup creamy peanut butter
  • 1 Tbsp soy sauce
  • 1/2 Tbsp rice vinegar
  • 1/2 Tbsp Thai sweet chili sauce
  • 1 Tbsp hot water, plus more as needed
 Salad
  • 2 cups chopped romaine
  • 1 1/2 cup chopped napa cabbage (you can also add in red cabbage for color if desired)
  • 1 cup edamame
  • 1/2 cup chopped carrots
  • 1/2 cup diced red bell pepper
  •  2 green onions, sliced (both white and green parts)
  • 1/2 cup chopped cilantro
  • chopped peanuts
Make the marinade for the chicken by whisking the oil, soy sauce, rice vinegar, lime juice, salt and pepper together.  Place the chicken in a ziploc bag and cover with the marinade.  Refrigerate for at least 20 minutes or up to 24 hours. Remove the chicken from the marinade and grill 6-7 minutes per side, until cooked through.  Remove to a plate and let cool, then cut into bite-sized pieces.

For the vinaigrette, combine all the ingredients in small bowl and whisk until well combined. Refrigerate until ready to use.

For the peanut dressing, whisk together all the ingredients until well combined. Add additional hot water, a little at a time, until the dressing is smooth and thin enough to drizzle.

In a large bowl, toss together the romaine, cabbage, edamame, carrots, bell pepper, green onion, and cilantro with the cooled and chopped chicken. Pour the vinaigrette over the top and toss until the ingredients are coated with the dressing.

Dish into salad bowls, drizzle with peanut sauce, and top with chopped peanuts.

Source: slightly adapted from Mel's Kitchen Cafe
Produce Used: Lime, romaine lettuce, napa cabbage, red cabbage, edamame, carrots, red bell pepper, green onion, cilantro

Wednesday, October 15, 2014

Andes Mint Chocolate Cookies

You know those days when you suddenly realize you need a dessert/treat to take to somebody and you have almost no time to make it happen?  These cookies are my go-to treat for those days (and for other days when I just want these little morsels of deliciousness to melt in my mouth).  They take only take five ingredients (four if you leave out the chocolate chips) so it is easy to keep everything on hand and they come together in a jiffy.  The Andes mints melt on top to make a perfect minty chocolate frosting and the cookies are perfectly soft and chewy.  You can thank me later.

Andes Mint Chocolate Cookies

Number of Servings: 3 1/2 to 4 dozen small cookies
Time to Prepare: 30 minutes


  • 1 Devil's Food cake mix
  • 1/2 cup oil
  • 2 eggs
  • 1/2 to 1 cup milk chocolate chips (optional)
  • 1 package Andes mints (the box that comes with 28 mints)
Preheat oven to 350 degrees.

Unwrap mints and cut in half (hamburger-style, so you have two almost square pieces).

Mix cake mix, oil, and eggs together until blended.  Stir in chocolate chips.  Drop by rounded teaspoonfuls onto ungreased baking sheets.  Bake for 6-8 minutes.

While cookies are still very hot, place half a mint on top of each cookie.  Let sit for about 5 minutes to melt the mint.  Use the back of a spoon to smooth the mint over the top of each cookie. 

Source: my sister-in-law, Kelly

Monday, October 13, 2014

Coq au Vin

I've talked about my culinary fears before and this was one of them.  It is a classically French dish (which is a huge part of why it scares me) and some of the recipes out there look pretty intimidating.  But my husband really wanted this for his birthday so I put on my big girl pants and gave it a shot.  Let's just say it was a good birthday.  He could not get enough of this (in fact he said it should serve 2 instead of 4) and is already trying to make plans for us to make it for company.  And unlike most meals, this is actually even better the second day.  Hooray for leftover night!

Coq au Vin

Number of Servings: 4
Time to Prepare: 1 hour

  • 1/2 cup bacon cut into 1/4" strips
  • 2 Tbsp olive oil
  • 4 to 5 chicken legs (about 2.5 lbs)--with bone and skin, preferably
  • 1/4 cup brandy
  • salt
  • pepper
  • 1 bay leaf
  • 1/4 tsp thyme
  • about 20 frozen pearl onions
  • 3 carrots, chopped
  • 3 Tbsp flour
  • 2 cups red wine (like Burgundy)
  • 2 cups chicken broth
  • 2 cloves minced garlic
  • 2 Tbsp tomato paste
  • 1/2 pound sliced mushrooms
Sauté bacon in oil in a deep skillet or a dutch oven until lightly browned, about 2 minutes. Transfer the bacon to a small bowl, leaving the drippings in the pan.

Heat the drippings over medium-high heat. Add the chicken and cook until nicely browned on both sides. Carefully pour the brandy into the pan, then ignite it with a long lighter or match.  Let it flame for a minute, tilting the pan by its handle and swirling the sauce to burn off alcohol.

Season the chicken with salt and pepper. Add the bay leaf and thyme to the pan and place the onions and carrots around the chicken. Cover and simmer gently, turning the chicken once, for about 10 minutes.

Uncover the pan, sprinkle the flour over everything, and turn the chicken and onions so the flour is absorbed by the sauce. Cover and cook, turning once, for 4 minutes more.

Slowly pour in the wine and chicken broth (the liquid should almost cover the chicken). Add the bacon, garlic, and tomato paste to the pan and stir to combine (don't worry about making sure the tomato paste gets completely incorporated).  Cover and gently simmer for 25 to 30 minutes, then check to make sure the chicken is done and the onions are tender.  If needed, cook for a few more minutes.  Add the mushrooms and simmer 4 to 5 minutes. The sauce should be just thick enough to lightly coat the chicken and vegetables. If it is too thin, boil it down rapidly to concentrate; if it is too thick, thin it with spoonfuls of broth. Serve immediately over egg noodles, rice, or similar.

Source: adapted from Leite's Culinaria
Produce Used: Carrots, garlic, mushrooms

Saturday, October 11, 2014

Blue Cheese Green Bean Almondine

I absolutely love green beans, especially fresh picked from the garden at my mom's house (though I usually have to settle for frozen ones from the grocery store).  Just cooking them up with a little butter, salt, and pepper is heavenly to me.  The problem with that is that my husband does not love them, especially when they are simply cooked so the lovely green bean flavor really comes through.  So I am always on the lookout for different ways to cook them that will let me enjoy my lovely beans but that my husband will still like.  This zingy version of the classic green bean almondine fits the bill perfectly.  The almonds give it a great crunch and the garlic and blue cheese give it that extra something that will convince your less-than-enthusiastic green bean eaters that maybe beans aren't so bad after all.

Blue Cheese Green Bean Almondine

Number of Servings: 4-6
Time to Prepare: 15 minutes

  • 1 Tbsp plus 1 tsp butter
  • 1/3 cup sliced almonds
  • 6 cloves minced garlic
  • 1 pound green beans (fresh or frozen)
  • kosher salt
  • black pepper
  • pinch of cayenne pepper
  • 2 oz crumbled blue cheese
Preheat oven to 400 degrees.

In a small frying pan over medium heat, melt 1 tsp butter.  Add sliced almonds and stir to coat.  Cook, stirring frequently, until lightly browned.  Scrape into a small bowl.

In the same pan, add the 1 Tbsp butter and melt.  Add the minced garlic and cook, stirring occasionally, until golden brown and very fragrant.  While the garlic cooks, steam the green beans for 5 to 7 minutes until crisp tender.

Stir the garlic and almonds into the green beans and season with kosher salt and black pepper to taste.  Add a pinch of cayenne and the blue cheese and stir to combine.  Pour into a 2 quart baking dish and bake for about 5 minutes, until the cheese is melty.

Source: adapted from Allrecipes
Produce Used: Garlic, green beans

Thursday, October 9, 2014

Vanilla Bean Custard Fruit Tart

Each separate part of this tart is finger-licking good so you can just imagine how incredible it is when it all comes together.  I may or may not have taken a few (large) tastes of the custard before putting it into the crust.  Speaking of the crust, it has this little bit of sweetness to it that complements the custard perfectly.  Use whatever fruits tickle your fancy or whatever is in season at the time.  And not only does it taste great, it looks really pretty too. 

Vanilla Bean Custard Fruit Tart

Number of Servings: 8
Time to Prepare: 2 hours 15 minutes

  • 1 1/4 cups milk
  • 1 vanilla bean
  • 3 egg yolks
  • 1/4 cup sugar
  • 2 Tbsp flour
  • 2 Tbsp cornstarch
  • 1/4 cup half and half
  • 1 1/2 cups flour
  • 1/2 cup butter
  • 1/4 cup sugar
  • 1 egg, lightly beaten
  • ice water
  • 1/2 cup strawberry jam
  • 1 Tbsp water
  • 3 cups fruit (peaches, kiwi, strawberries, blackberries, blueberries, raspberries, etc.)
In a medium stainless steel bowl, mix the sugar and egg yolks together with a wooden spoon.  Sift the flour and cornstarch together and then add to the egg mixture, mixing until smooth.

Meanwhile, in a saucepan combine the milk and vanilla bean on medium heat until boiling.  Remove from heat take the vanilla bean out.  Pour the hot milk slowly into the egg mixture, whisking constantly to prevent curdling. Slice the vanilla bean lengthwise and scrape the seeds out into the egg mixture.

Place the egg mixture back into the saucepan and cook over medium heat until boiling, whisking constantly. When it boils, whisk constantly for another 30 – 60 seconds until it becomes thick like pudding.

Remove from heat and immediately whisk in the half and half. Pour into a clean bowl and immediately cover the surface with plastic wrap (touching the surface of the custard). Cool. If not using right away refrigerate until needed, up to 3 days.

Put the 1 1/2 cups flour in a medium bowl and cut in the butter until it resembles coarse meal.  Gradually add the beaten egg, beating just until incorporated.  Add ice water slowly, as needed, until the dough comes together.  Flatten the pastry into a disk, cover with plastic wrap, and refrigerate for 20 minutes or until firm.

Roll our the dough about an inch larger than your tart pan.  Gently lay in pan and lightly press pastry into bottom and up sides of pan.  Cut off any excess.  Cover and refrigerate for 20 minutes.

Preheat oven to 400 degrees. Line unbaked pastry shell with parchment paper or aluminum foil. Fill tart pan with pie weights, rice, or beans, making sure the weights are to the top of the pan and evenly distributed over the entire surface. Bake crust for 20 to 25 minutes until crust is dry and lightly golden brown. Remove weights and bake 5 more minutes until the crust is completely cooked.  Cool crust on wire rack.

Stir the jam and 1 Tbsp water together in a small bowl.  Heat in the microwave until smooth, then let cool slightly.  Brush glaze on cooled crust and let dry for 20-30 minutes.  Spread the custard into the crust. 

Slice strawberries, kiwi, peaches, etc.  Arrange fruit on top of the custard in overlapping concentric circles, making sure to cover as much of the custard as possible.  Brush fruit with remaining glaze and serve.

Source: adapted from Karen in the Kitchen
Produce used: Peaches, kiwi, strawberries, blackberries, blueberries, raspberries

Tuesday, October 7, 2014

Thai Chicken Crunch Wraps

The first time we had these, my husband was working late.  My four-year-old son told me, "Send daddy a message.  Tell him this is the greatest dinner we ever had--I hope you enjoy it when you get home."  Score!  And let me tell you, he is not far from the truth.  These wraps are awesome.  I could not get enough.  The crunch of the lettuce and carrots, the briny tang of the cucumbers, the sweet spiciness of the sauce...they all work together to produce this incredible combination of tasty goodness.  Wait, it gets better.  You can prep all the parts in advance so the whole thing comes together in two minutes.

Thai Chicken Crunch Wraps

Number of Servings: 3
Time to Prepare: 20 minutes

  • 1/4 cup rice vinegar
  • 1 1/2 tsp sugar
  • 1/4 tsp kosher salt
  • half a cucumber, halved lengthwise and cut into thin strips
  • 1/3 cup mayo (preferably mayo with olive oil)
  • 2 Tbsp Thai sweet chili sauce
  • 2-3 tortilla wraps
  • romaine lettuce, shredded
  • 2 small chicken breasts, cooked and thinly sliced
  • 3/4 cup matchstick carrots
  • 1/4 cup chopped cilantro
Whisk together the vinegar, sugar, and salt in a shallow dish.  Add the cucumbers, tossing to cover with the liquid.  Let them stand for 10-15 minutes while you prepare the other ingredients (these can also be made several days in advance and covered in the refrigerator).

Stir together the mayo and sweet chili sauce in a small bowl.  Spread a couple tablespoons evenly on the tortillas. Top with lettuce, chicken, cucumbers, carrots, and cilantro. Roll the tortilla up tightly so the ends are enclosed. Serve immediately.

Source: adapted from Mel's Kitchen Cafe
Produce Used: Cucumber, romaine lettuce, carrots, cilantro

Sunday, October 5, 2014

Chicken Enchilada Soup

This soup is absolutely loaded with veggies, but possibly the best part about that is that they get blended up so your kids won't even know you're filling them with vegetable-y goodness.  Not to mention, the flavors are fantastic.  I made this for my in-laws and my father-in-law (who is not generally a huge eater) had three servings.  Now that's what I call a big win.

Chicken Enchilada Soup

Number of Servings: 8
Time to Prepare: 1 hour 15 minutes

  • 2 Tbsp olive oil
  • 1 medium onion, chopped
  • 5-6 cloves garlic, minced
  • 2 carrots, chopped
  • 2 stalks celery, chopped
  • 1 red bell pepper, diced
  • 1 jalapeno pepper, seeded and diced
  • 1 1/2 tsp chili powder
  • 1 heaping tsp cumin
  • 1 heaping tsp ground coriander
  • 1 tsp oregano
  • 3/4 tsp paprika
  • 6 cups chicken broth
  • 1 (14.5 oz) can diced tomatoes, divided
  • 1 cup water
  • 6 (6") corn tortillas
  • kosher salt
  • pepper
  • 2 chicken breasts, cooked and shredded
  • 1/2 cup cream
  • chopped green onion
  • shredded cheddar cheese
  • tortilla chips
Heat the olive oil in a large pot over medium heat. When hot, add the onion, garlic, carrots, celery, and bell pepper, and saute until fragrant and the vegetables are tender.

While the vegetables are cooking, combine the chili powder, cumin, coriander, oregano, and paprika. When the vegetables are tender, add the spices and stir to combine.  Add the chicken broth, 1/2 cup diced tomatoes, and water and then blend until smooth using an immersion blender.  Bring to a boil; tear the tortillas into pieces and add them to the soup.  Cover, turn the heat down, and simmer 30-45 minutes or until the tortillas are breaking apart.  Remove from heat and blend again until smooth. Add the remaining tomatoes, the shredded chicken, and the cream and stir until combined. Season to taste with salt and pepper. Serve immediately, topped with green onions, shredded cheese, and tortilla chips.

Source: slightly adapted from Our Best Bites
Produce Used: Onion, garlic, carrots, celery, red bell pepper, jalapeno, green onion

Friday, October 3, 2014

Mushroom Barley Risotto

I mentioned last month that I had recently gotten into barley in a big way.  If you've never tried barley and you're feeling a little on-the-fence about the idea, make this recipe.  It is incredibly creamy with the perfect amount of softness and bite.  The flavor is just subtle yet strong enough that this is great on its own but can also work well as a base for a nice saucy dish.  You can even make it heartier by adding chicken and serve it as a main dish.  It is just an all-around great dish.

Mushroom Barley Risotto

Number of Servings: 4
Time to Prepare: 1 hour 15 minutes

  • 3 cups chicken broth
  • 2 cups water
  • 1 Tbsp olive oil
  • 1/2 yellow onion, diced
  • 1/2 red onion, diced
  • 1-2 cloves garlic, minced
  • 1/2 tsp kosher salt
  • 1/4 tsp black pepper
  • 1 1/2 cups sliced mushrooms
  • 3/4 cup milk
  • 1/2 cup evaporated milk
  • 1 cup pearl barley
  • 1 Tbsp butter
  • 1 tsp balsamic vinegar
  • 1/2 cup grated Parmesan cheese
Place chicken broth and water in a large microwave proof container and heat on high for 5-6 minutes (or heat to boiling in a saucepan on the stove and then remove from heat).

While the broth & water heat, heat the olive oil in a large saucepan over medium-high heat.  Add the onion and garlic.  Cook and stir until the onion begins to brown slightly on the edges.  Season with salt and pepper, then add mushrooms and cook until mushrooms are tender.

Add the milk and evaporated milk to the saucepan with the mushrooms and heat for two minutes.  Stir in the barley and reduce heat to medium.

Stir in one cup of the broth/water mixture and continue stirring until most of the liquid has been absorbed.  Continue adding the broth/water mixture one cup at a time, stirring until liquid is mostly absorbed after each addition.  This will take about 45-60 minutes.  After the last addition, keep stirring until liquid is absorbed and mixture is creamy.  The barley should be tender but still slightly firm (al dente).  Stir in the butter, balsamic vinegar, and Parmesan and serve warm.


Source: adapted from Allrecipes
Produce Used: Onion, red onion, garlic, mushrooms

Wednesday, October 1, 2014

Fire Roasted Mac and Cheese

I mentioned in my last post how I try to sneak spinach into foods where I won't be able to taste it.  This is another one of those recipes and let me tell you, it is a winner.  My four-year-old LOVES this stuff, even though he generally doesn't like feta (he does, however, love spinach, asparagus, and broccoli....he's weird).  I kid you not, every time I make this for guests, they want the recipe.  And my husband definitely can't get enough of this.  Really, you can't lose.

Fire Roasted Mac and Cheese

Number of Servings: 8 to 10
Time to Prepare: 1 hour

  • 1 lb orzo pasta
  • 3 Tbsp butter
  • 3 Tbsp flour
  • 2 1/2 cups milk
  • 10 oz sharp white cheddar cheese, shredded
  • 4 oz Monterey Jack cheese, shredded
  • 1 1/4 cups feta cheese, divided
  • 1 1/2 tsp oregano
  • 1 tsp salt
  • 1/2 tsp pepper
  • 1 (14 oz) can fire roasted diced tomato
  • 4 to 5 cups packed spinach, roughly chopped
Preheat the oven to 400 degrees.  Lightly coat a 9x13 pan with cooking spray and set aside.

Bring a large pot of salted water to a boil and cook the orzo pasta until al dente.  Drain and set aside.

While the pasta is boiling, prepare the sauce.  Melt butter in a large saucepan over medium heat. Whisk in the flour until smooth and let the mixture cook for 1-2 minutes, stirring constantly.  Gradually stir in the milk, whisking constantly, and let it cook at a very gentle simmer for 4-5 minutes until it has thickened considerably.

Remove from heat and stir in the cheddar and Monterey Jack cheeses, 1/2 cup at a time, making sure each addition has melted before adding the next.  Stir in 3/4 cup of the feta cheese (it won't melt all the way).

Stir in the oregano, salt, and pepper.  Add the tomatoes (undrained) and the spinach.  Stir the mixture well to allow the spinach to wilt.

Stir in the cooked orzo. Spread the pasta mixture into the prepared baking dish and sprinkle with remaining 1/2 cup feta cheese. Bake for 15-20 minutes until golden and bubbly.
Let sit for 5-10 minutes before serving.

Source: adapted from Mel's Kitchen Cafe
Produce Used: Spinach